 Table of ContentsExtensions
This plug-in enables you to edit the connection settings for your database. Furthermore it allows you to install table, transfer required data and create backups.
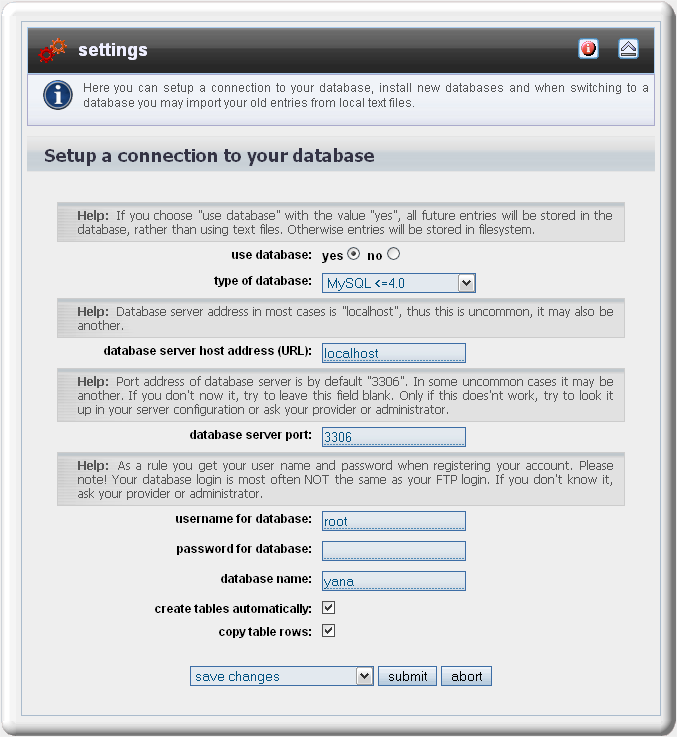
Figure: database connection settings
Set the option "use database" to the value "yes", to use the database connection with the given values. The installation of the database is automatically implemented. Only in the event of an error, you need to manually intervene.
Should any of these steps result in an error, the connection is not activated and an error message is shown. A detailed description of the error can be found in the error log. Please note that logging must have been activated at this point (see chapter "logging and error messages").
In case of an error, you may also complete the steps manually, which usually would be carried out automatically during activation of the database connection. To do so, proceed as follows.
Please also note the compatibility notes!
 Note: This step is executed automatically, when a database connection is activated. The form shown here is meant to be used for manual intervention in case of an error.
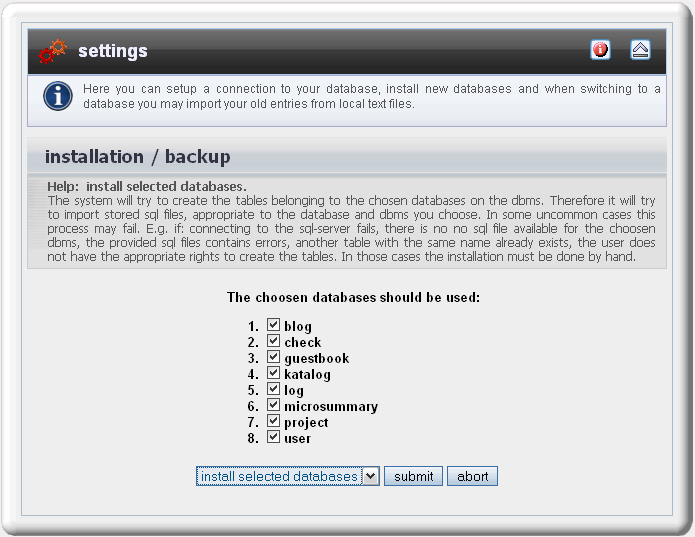
Figure: form to install tables
This step will try to create the tables belonging to the chosen databases on the database server. Therefore it will try to import sql files, appropriate to chosen type of database. These requires prior proper set up of a connection to the database. You should however not yet activate this connection before you have installed the required tables.
In some uncommon cases this process may fail. For example, if: connecting to the database server fails, there is no SQL file available for the chosen DBMS, the generated SQL contains errors, another table with the same name already exists, the user does not have the appropriate rights to create the tables. In those cases the installation needs to be done by hand.
The required SQL files to create the tables can be found in chapter "Advanced User's Guide" / "Configuration".
Note: This step is executed automatically, when a database connection is activated. The form shown here is meant to be used for manual intervention in case of an error.
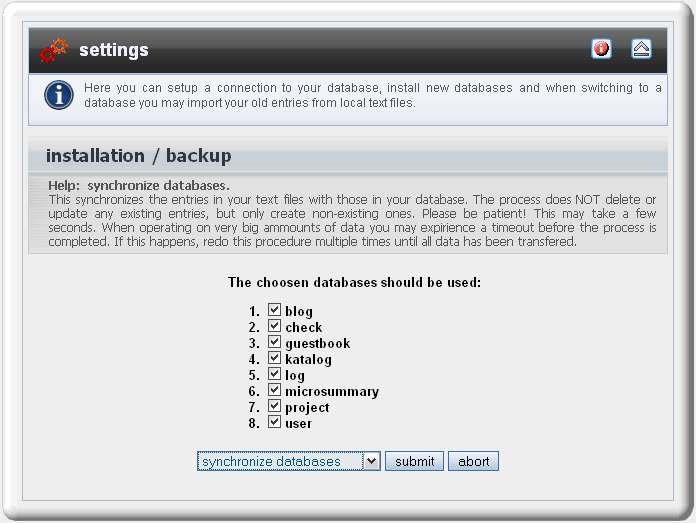
Figure: form to copy table contents to your database
This synchronizes the entries in your text files with those in your database. The process does NOT delete or update any existing entries, but only creates new ones. When operating on very big amounts of data you may experience a timeout before the process is completed. If this happens, redo this procedure multiple times until all data has been transfered.
Note: This option requires an active database connection.
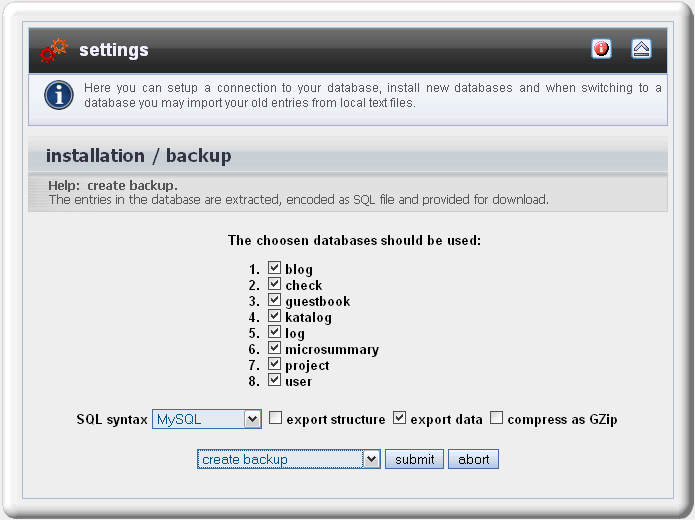
Figure: form to create a backup of a database
Use this option to create a backup copy of your database.
 Thomas Meyer, www.yanaframework.net
 Plugin: Anti-Spam