 Table of ContentsDeveloper's Manual
If you reconstructed the tutorial up to this point, you now already possess a simple database. However, to "bring it to life", you still need the business-logic of the application itself, as well as an user interface to view forms and data. You will create both in the following section.
Now open the sitemap of the Yana Framework in a scriptable web browser, for example, Firefox 2.0. Click the link "Login" an log on the system as "administrator". You will need administrator privileges to proceed with the next step.
At the sitemap click the link "Software Development Kit". Should this not yet been installed, or enabled, please do it now. For more information see the chapter "Creating plug-ins and applications".
If you opened the link, you should be able to see the following form.

Figure: Front page of the "Software Development Kit"
First, enter a name (for example, "my blog"), some description, and select a logo for your plug-in. Using the tab "author" you can provide information about your name, your web site address and contact.
On the page "other data" set the "type of application" to "primary". This declares the plug-in to be a "main program". This is optional, but may increase performance.
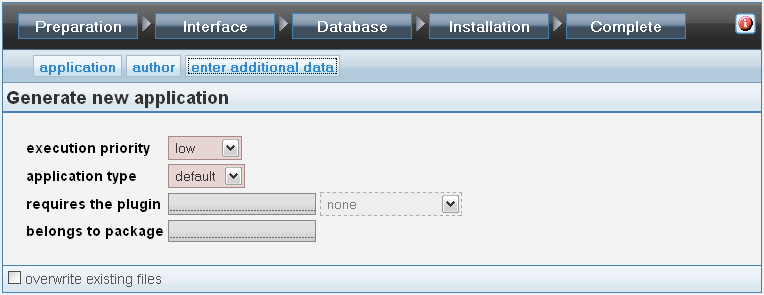
Figure: Setting the type of application
Next click the tab "Database".
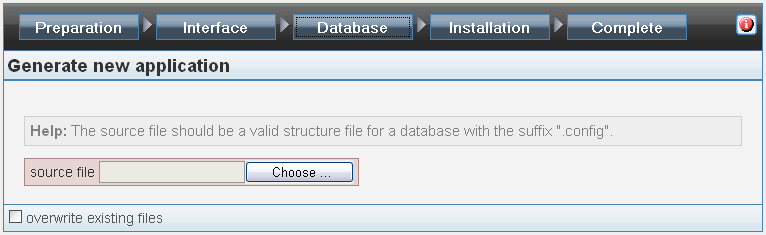
Figure: Selecting the database structure file
Click the button "choose". Select the file "blog.config", you created, as the source.
Additional information about your plug-in is not necessary at this point. Click on "Finish". The source code and the user interface for your first plug-in will now be generated. Next you can immediately try your recently created plug-in.
Open the administration menu in expert mode. In the right column, section "plugins", click on "refresh list." Look for the name of your plug-in in the list and activate it, by clicking the checkbox next to the plug-in's name. Click on the "Save changes".
The following figure shows this menu.
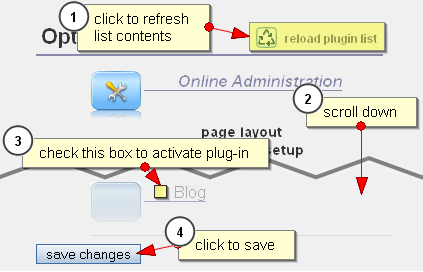
Figure: Activating a plug-in

Attention! If you DON'T have database support activated you DON'T need to take the following step.
If you activated the database support and for example use a MySQL database for storing the entries, then you must install the tables for the plug-in first. To do so, open the menu "Database setup" and select "install marked databases" from the drop-down menu. A list of options will be shown. Enable only the entry of the database of your plug-in and click on "save changes".
See the following figure:
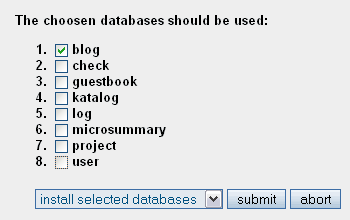
Figure: Installing a table on your database
Next go back to the sitemap of the framework. Now the name of your plug-in should be visible in the main menu. Click this link. You should now see the starting page of your application, as shown in the following figure.
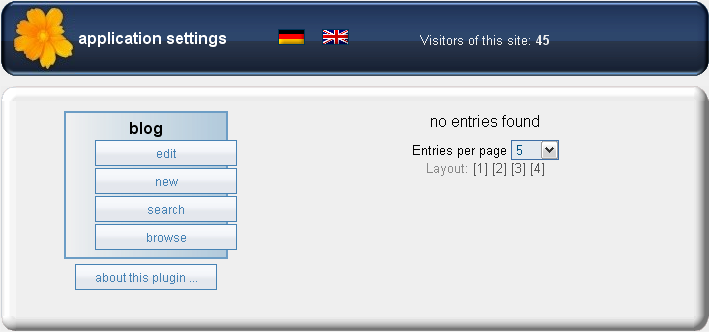
Figure: Start page of the new plug-in
The text "no entries found" indicates that there are no entries stored in your blog yet. Click on the link "new" to create a new entry.
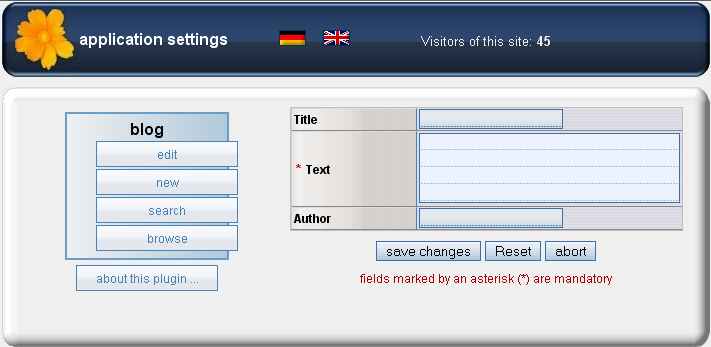
Figure: Creating a new entry
Next you should see the following index page. (The figure shows the form with two entries)
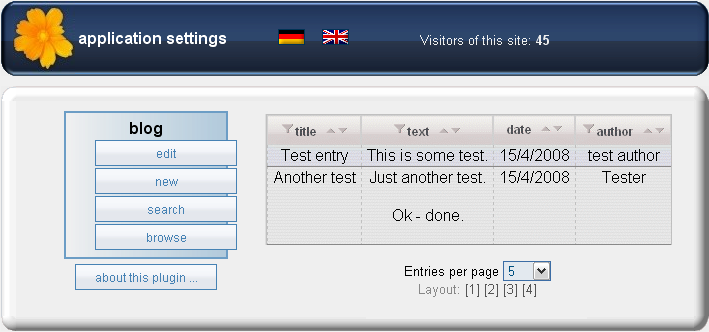
Figure: Viewing the entries
There are alternative views. Below the table you will find a list with 4 different layouts. So just choose the one you like best.
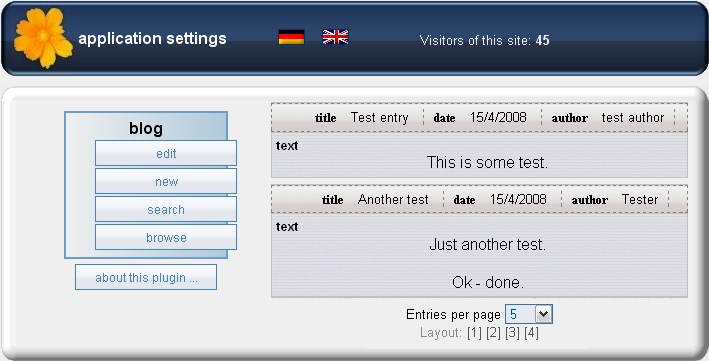
Figure: Detailed view
Click the link "edit" to edit entries. You should see the following form.
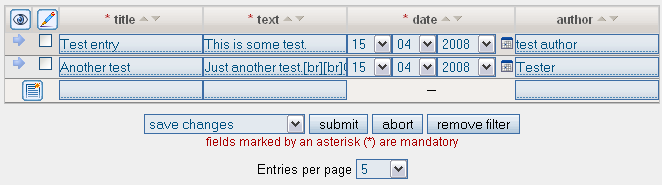
Figure: Editing entries
Clicking on the columns changes the sorting of columns. You need to mark all rows, which would like to change, by clicking the check box in the left column. The last row has only empty fields, which you can use to create a new entry the fast and easy way.
This form has a special feature. If you set the property "entries per page" to the value "1", the view for the current entry is maximized, which is more comfort editing it, as the following figure shows.
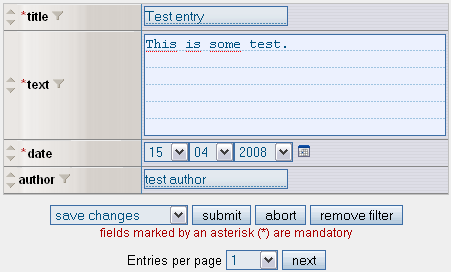
Figure: Editing a single entry
If you wish, you can also try the other functions of your new plug-in.
As you could see, the Yana Framework has already done a big part of the necessary work for you. However, there are certainly some details that you might want to customize to your needs. The following section of the tutorial will discuss how to do this.
 Thomas Meyer, www.yanaframework.net
 Chapter 2: Creating the database